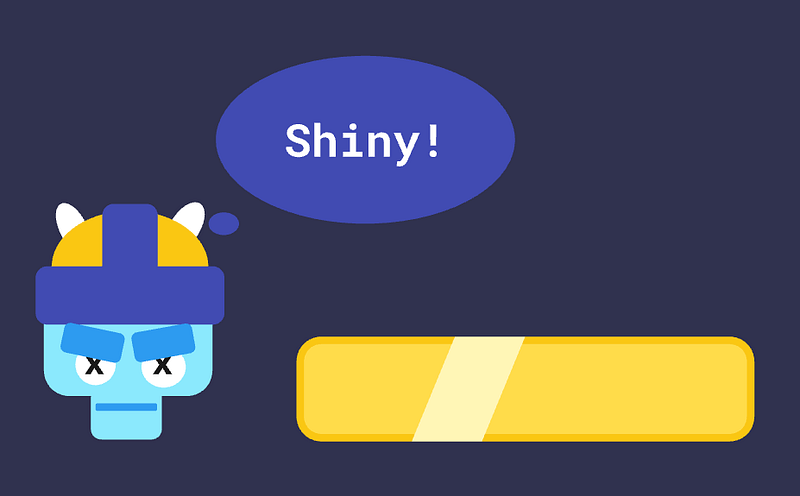
A sweeping shine effect on UI buttons is a common effect in games. There are several ways to do it. For years, I’ve been doing it by placing masks on the button and then animating a UI element from one side to the other.
This causes performance problems and scalability headaches. Masks force Unity to render additional draw calls and create overdraw issues where pixels get drawn multiple times. Each masked element requires its own rendering pass, which quickly adds up when you have multiple UI elements with shine effects.
Beyond performance, this approach doesn’t scale well, when you resize buttons or change layouts, you need to manually adjust animation curves and timing for each element. It’s a maintenance nightmare that becomes exponentially worse as your UI grows in complexity.
When trying to work around these issues by creating the effect via shader, I ran into a different problem. Shine effects work by creating a line that sweeps across the UI element from one edge to the other. To do this properly, the shader needs to know “where am I on this button?”, is this pixel at the left edge (0%), the middle (50%), or the right edge (100%)?
This is what UV coordinates do, they tell each pixel where it sits on the texture, typically in a 0–1 range. For a shine effect to sweep smoothly from left to right, it needs these coordinates to be uniform and predictable. But since we use atlases to optimize UI performance, the UV coordinates aren’t uniform anymore.
The Atlas UV Problem
When you try to apply effects like shine to regular sprites that aren’t part of an atlas, it’s pretty simple. The UV coordinates (which tell the shader where each pixel is on the texture) are nice and uniform, spanning the full 0–1 range across your image.
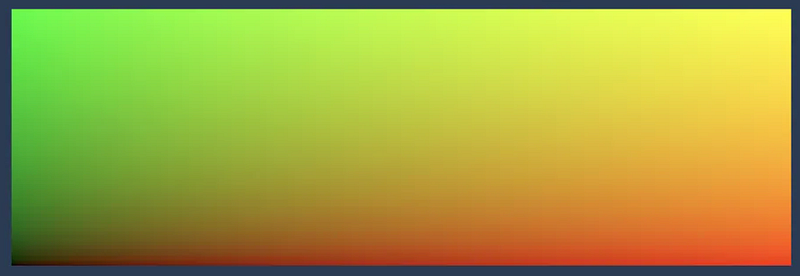
But when your sprites come from a texture atlas? The UV coordinates only cover the tiny portion of the atlas where your sprite exists. Instead of clean 0–1 coordinates, you might get something like 0.2–0.4 on the X axis and 0.6–0.8 on the Y axis.
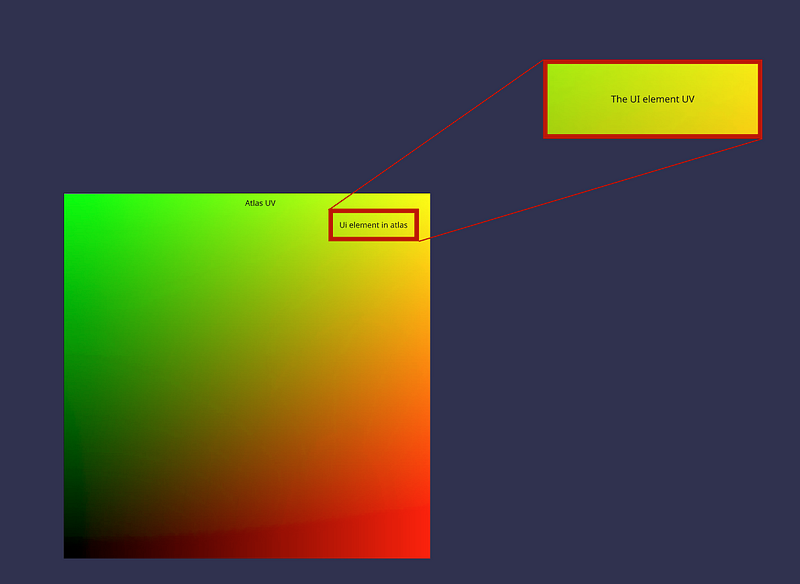
This creates a problem for effects like shine that need to sweep across the entire UI element. But since we don't know the coordinates of the ui element, we don't know how to move the shine. If we use a shine shader that would work on a non-Atlased sprite on an atlased sprite, it will just appear to glow on and off. Each sprite from the atlas will look different depending on its size and position.
The solution involves two parts: Your mesh has 4 UV channels, even though we usually use one. First, we need to create proper UV coordinates that ignore the atlas constraints, and second, we need a shader that uses those coordinates to create our shine effect.
Part 1: The UV Coordinate Fixer
Here’s our first piece of the puzzle, a script that calculates clean, uniform UV coordinates for our atlased images:
[ExecuteAlways]
public class ImageUVCreator : BaseMeshEffect
{
    [SerializeField] private RectTransform rectTransform;

    public override void ModifyMesh(VertexHelper vertexHelper)
    {
        var vertices = new List<UIVertex>();
        vertexHelper.GetUIVertexStream(vertices);

        // Find the actual bounds of our UI element
        var minX = float.MaxValue;
        var maxX = float.MinValue;
        var minY = float.MaxValue;
        var maxY = float.MinValue;

        foreach (var vertex in vertices)
        {
            if (vertex.position.x < minX) minX = vertex.position.x;
            if (vertex.position.x > maxX) maxX = vertex.position.x;
            if (vertex.position.y < minY) minY = vertex.position.y;
            if (vertex.position.y > maxY) maxY = vertex.position.y;
        }

        var rectAspectRatio = rectTransform != null ?
            rectTransform.rect.width / rectTransform.rect.height : default;

        // Create new, clean UV coordinates
        for (var i = 0; i < vertices.Count; i++)
        {
            var vertex = vertices[i];
            var normalizedX = Mathf.InverseLerp(minX, maxX, vertex.position.x);
            var normalizedY = Mathf.InverseLerp(minY, maxY, vertex.position.y);

            vertex.uv1 = new Vector3(normalizedX, normalizedY, rectAspectRatio);
            vertices[i] = vertex;
        }

        vertexHelper.Clear();
        vertexHelper.AddUIVertexTriangleStream(vertices);
    }
}
BaseMeshEffect is an abstract base class in Unity’s UI system that allows you to create custom effects that modify the geometry of UI elements like Text, Image, and other Graphic components.
What this script does is pretty clever. Instead of relying on Unity’s atlas-constrained UV coordinates, it looks at where each vertex sits in 3D space and creates brand new UV coordinates based on that.
The key part is the InverseLerp function, which takes a position and figures out where it sits between the minimum and maximum bounds as a percentage. So if a pixel is exactly in the middle of our UI element, it gets UV coordinates of (0.5, 0.5), nice and predictable.
The ModifyMesh function only executes when the UI element is built or modified - not every frame. This happens during layout rebuilds, which typically occur when you change the UI (resize, enable/disable, etc.). For static UI elements, this means zero ongoing performance cost.
Part 2: The Shine Shader
Now that we have clean UV coordinates, we can create our shine effect. The shader is surprisingly straightforward in concept:
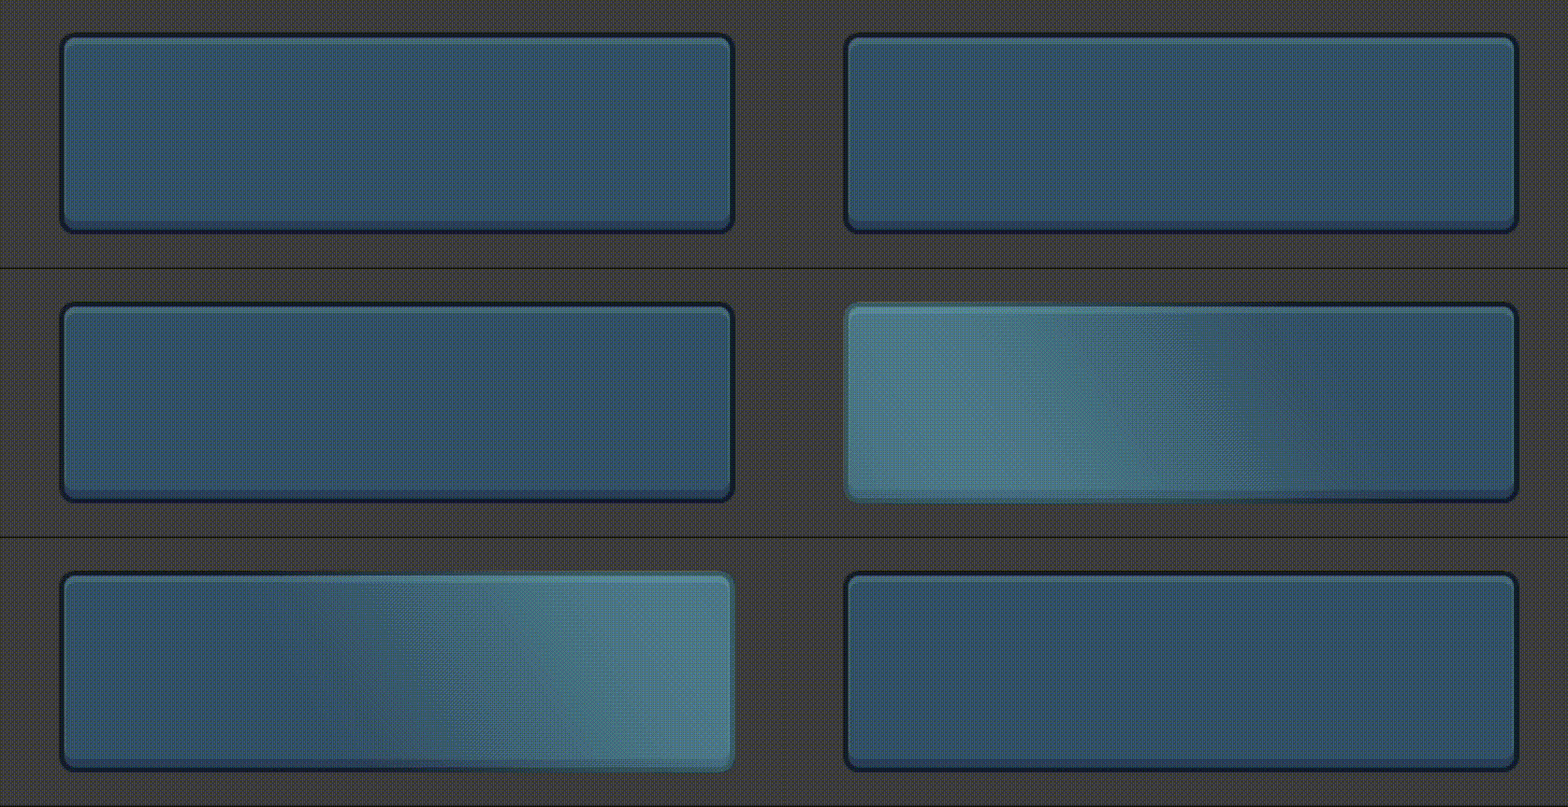
The Basic Idea: Think of the shine as an invisible line that moves across your UI element over time. The shader looks at each pixel and asks “how close am I to that moving line?” Pixels that are close to the line get brightened up (the shine effect), while pixels far away stay their normal color.
How it moves: The line starts off-screen on one side and sweeps across to the other side. We use Unity’s built-in time to make this movement automatic and smooth. You can control how fast it moves and at what angle it sweeps.
Keeping it contained: This is where our custom UV coordinates become crucial. The shader reads these custom coordinates from the UV1 channel (texcoord1) that our script created, rather than the original UV coordinates that were constrained by the atlas. The shader uses them to make sure the shine only appears within the boundaries of your UI element, not spilling over onto other parts of the screen.
Customization options: The shader gives you control over the shine color, how bright it is, how wide the shine band is, and the angle it sweeps at. You can even turn it on and off, or trigger it to start at specific times.
The clever part is that no matter how your button is sized or positioned on screen, the shine will always sweep cleanly from edge to edge because we’re using those normalized UV coordinates we created earlier.
How to Use It
Setting this up is straightforward:
- Add the UV Creator: Attach the ImageUVCreator script to any UI Image component that uses a sprite from a texture atlas
- Apply the shader: Create a new Material using the “UI/Shine” shader
- Assign the material: Apply your new material to the Image component
- Tweak the settings: Adjust the shine properties in the material inspector until it looks just right
Below, you can see a simple shine shader:
Shader "UI/ShineImproved"
{
    Properties
    {
        [PerRendererData] _MainTex ("Sprite Texture", 2D) = "white" {}
        _Color ("Tint", Color) = (1,1,1,1)

        // Shine Properties
        [Toggle] _ShineEnabled ("Enable Shine", Float) = 1
        _ShineStartTime ("Shine Start Time", Float) = 0
        _ShineColor ("Shine Color", Color) = (1,1,1,0.8)
        _ShineWidth ("Shine Width", Range(0.01, 100.0)) = 50.0
        _ShineSpeed ("Shine Speed", Range(0.1, 5.0)) = 1.0
        _ShineBrightness ("Shine Brightness", Range(0.0, 2.0)) = 1.5
        _ShineAngle ("Shine Angle", Range(-90, 90)) = 15

        // UI Properties
        _StencilComp ("Stencil Comparison", Float) = 8
        _Stencil ("Stencil ID", Float) = 0
        _StencilOp ("Stencil Operation", Float) = 0
        _StencilWriteMask ("Stencil Write Mask", Float) = 255
        _StencilReadMask ("Stencil Read Mask", Float) = 255
        _ColorMask ("Color Mask", Float) = 15

        [Toggle(UNITY_UI_ALPHACLIP)] _UseUIAlphaClip ("Use Alpha Clip", Float) = 0
    }

    SubShader
    {
        Tags
        {
            "Queue"="Transparent"
            "IgnoreProjector"="True"
            "RenderType"="Transparent"
            "PreviewType"="Plane"
            "CanUseSpriteAtlas"="True"
        }

        Stencil
        {
            Ref [_Stencil]
            Comp [_StencilComp]
            Pass [_StencilOp]
            ReadMask [_StencilReadMask]
            WriteMask [_StencilWriteMask]
        }

        Cull Off
        Lighting Off
        ZWrite Off
        ZTest [unity_GUIZTestMode]
        Blend SrcAlpha OneMinusSrcAlpha
        ColorMask [_ColorMask]

        Pass
        {
            Name "Default"
        CGPROGRAM
            #pragma vertex vert
            #pragma fragment frag
            #pragma target 2.0

            #include "UnityCG.cginc"
            #include "UnityUI.cginc"

            #pragma multi_compile_local _ UNITY_UI_CLIP_RECT
            #pragma multi_compile_local _ UNITY_UI_ALPHACLIP

            struct appdata_t
            {
                float4 vertex   : POSITION;
                float4 color    : COLOR;
                float2 texcoord : TEXCOORD0;
                float2 texcoord1 : TEXCOORD1;  // Clean UVs from ImageUVCreator
            };

            struct v2f
            {
                float4 vertex   : SV_POSITION;
                fixed4 color    : COLOR;
                float2 texcoord  : TEXCOORD0;
                float2 shineUV   : TEXCOORD1;  // Clean UVs for shine
                float4 worldPosition : TEXCOORD2;
            };

            sampler2D _MainTex;
            fixed4 _Color;
            fixed4 _TextureSampleAdd;
            float4 _ClipRect;
            float4 _MainTex_ST;

            // Shine properties
            float _ShineEnabled;
            float _ShineStartTime;
            fixed4 _ShineColor;
            float _ShineWidth;
            float _ShineSpeed;
            float _ShineBrightness;
            float _ShineAngle;

            v2f vert(appdata_t v)
            {
                v2f OUT;
                OUT.worldPosition = v.vertex;
                OUT.vertex = UnityObjectToClipPos(OUT.worldPosition);

                OUT.texcoord = TRANSFORM_TEX(v.texcoord, _MainTex);
                OUT.shineUV = v.texcoord1;  // Use the clean UVs from UV1 channel

                OUT.color = v.color * _Color;
                return OUT;
            }

            fixed4 frag(v2f IN) : SV_Target
            {
                // Sample the main texture
                half4 color = (tex2D(_MainTex, IN.texcoord) + _TextureSampleAdd) * IN.color;

                // Calculate shine effect if enabled
                if (_ShineEnabled > 0.5)
                {
                    // Calculate time-based position for the shine sweep
                    float time = (_Time.y - _ShineStartTime) * _ShineSpeed;
                    float shinePos = fmod(time, 3.0) - 1.0; // -1 to 2 range for full sweep

                    // Convert angle to radians
                    float angleRad = radians(_ShineAngle);
                    float cosAngle = cos(angleRad);
                    float sinAngle = sin(angleRad);

                    // Calculate the position along the shine direction
                    // Using the clean 0-1 UVs from texcoord1
                    float2 uv = IN.shineUV;

                    // Project UV position onto the shine direction
                    // This determines where this pixel is along the shine sweep
                    float projectedPosition = uv.x * cosAngle + uv.y * sinAngle;

                    // Calculate distance from the current shine position
                    // Scale shinePos to match UV space (0-1)
                    float scaledShinePos = shinePos * 1.414; // sqrt(2) to cover diagonal
                    float distanceToShine = abs(projectedPosition - scaledShinePos);

                    // Create shine mask
                    float shineMask = 1.0 - smoothstep(0.0, _ShineWidth * 0.01, distanceToShine);

                    // Ensure shine only appears within the UI element bounds
                    float2 boundsMask = step(0.0, uv) * step(uv, 1.0);
                    shineMask *= boundsMask.x * boundsMask.y;

                    // Apply shine effect
                    float3 shineEffect = _ShineColor.rgb * shineMask * _ShineBrightness;
                    color.rgb += shineEffect * color.a; // Multiply by alpha to respect transparency
                }

                #ifdef UNITY_UI_CLIP_RECT
                color.a *= UnityGet2DClipping(IN.worldPosition.xy, _ClipRect);
                #endif

                #ifdef UNITY_UI_ALPHACLIP
                clip (color.a - 0.001);
                #endif

                return color;
            }
        ENDCG
        }
    }
}
I will note that because we use a custom shader, it will break batching in the UI. But the batch breaking will cause fewer draw calls than masks would cause.
Big thx for my coworker Dana for help with the UV solution 🙏